Affiliate programs provide an additional source of income for all type of bloggers. Whether you are a fashion, lifestyle, food, travel or any other type of blogger, you can use affiliate programs run by different companies to drive sales and earn a commission. Bloggers with loyal audience find great results with different affiliate programs.
If you are using affiliate programs on your blog, you already know how they work: Your visitors click a link which takes them to your partner’s website. If your visitor purchases something, you get a small percentage from that sale as commission.
In travel blogging field, bloggers usually work with popular flight and hotel search engines like Booking.com, Agoda, Kayak, Skyscanner, Momondo etc. All these platforms provide a set of tools you can display on your blog in addition to text links. I also use different affiliate programs and have found best results with some of them.
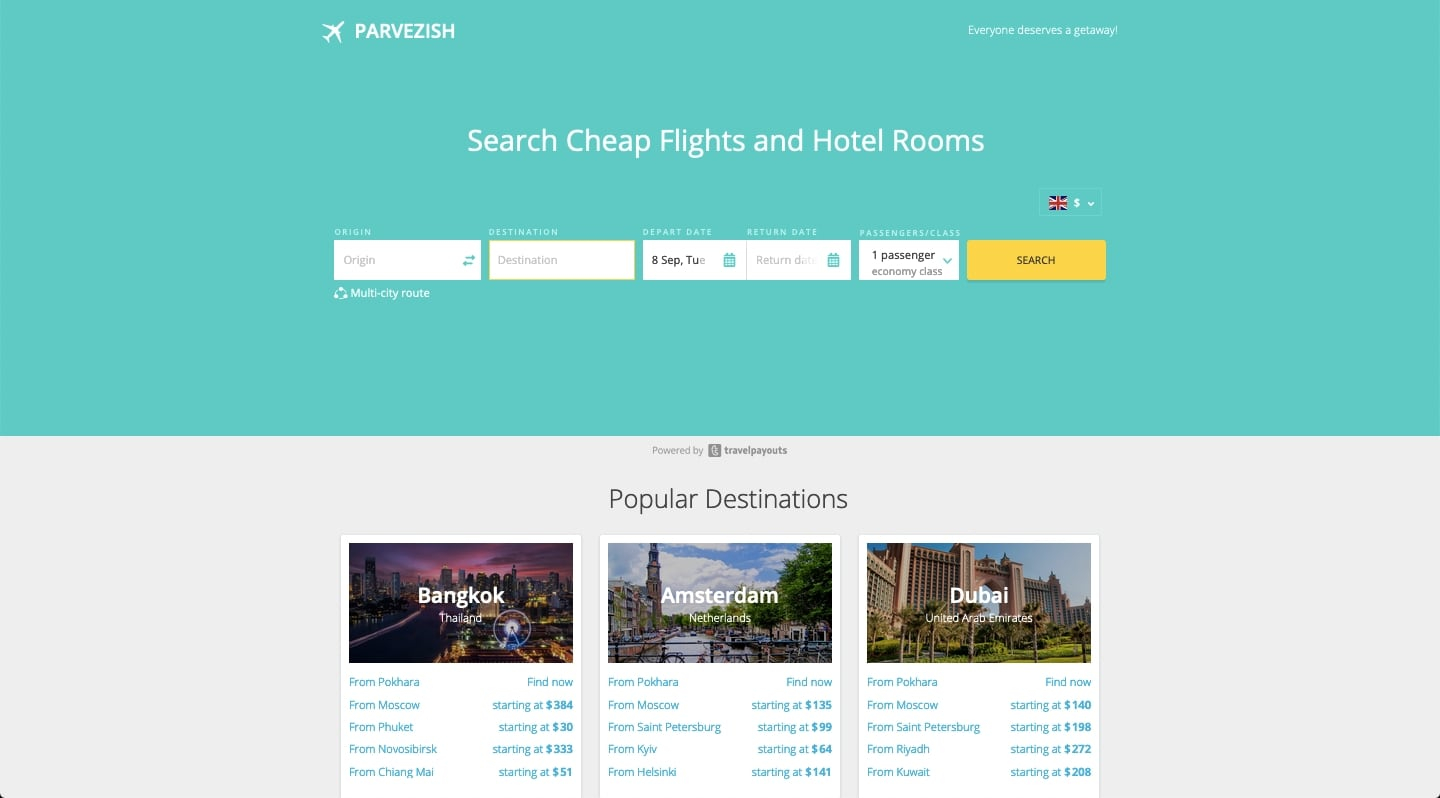
In this article, however, I would like to focus on White Label flight search. Using a white label, you can develop your own flight search engine with your logo and colours without going through the pain of coding. You will direct visitors to this page where they will search for a flight as they usually do on sites like Skyscanner. And if they book a flight, you will receive a commission.
If you want to develop your own white label flight search engine for free and earn additional revenue from your travel blog, this article is for you. It’s very easy to setup and shall take no more than 30 minutes. Sounds interesting? Let’s go ahead then.
About TravelPayouts
I came across TravelPayouts when I was looking for suitable affiliate programs for my blog. They are beginner friendly, which means they allow relatively new bloggers to join, too. They do not have joining requirements like traffic, site age etc.

What made me join (and continue using) TravelPayouts affiliate program was the ease of use and the possibility of developing a white label flight search engine.
They have up to 180 days of cookie life, a robust API, and multilingual tools. In addition, they have different widgets you can display on your blog. To make things easier, they offer a free WordPress plugin, too.
All these reasons were enough to convince me to join Travelpayputs affiliate program. After testing and familiarising myself with their platform, I recently launched my own flight search engine made using their white label facility. Now I will show you how to launch your own.
Requirements
- A working website.
- TravelPayouts affiliate account. Click here to join.
- Ability to edit DNS records.
- Basic HTML and CSS knowledge.
- Patience.
Step 1: Join TravelPayouts Affiliate Program
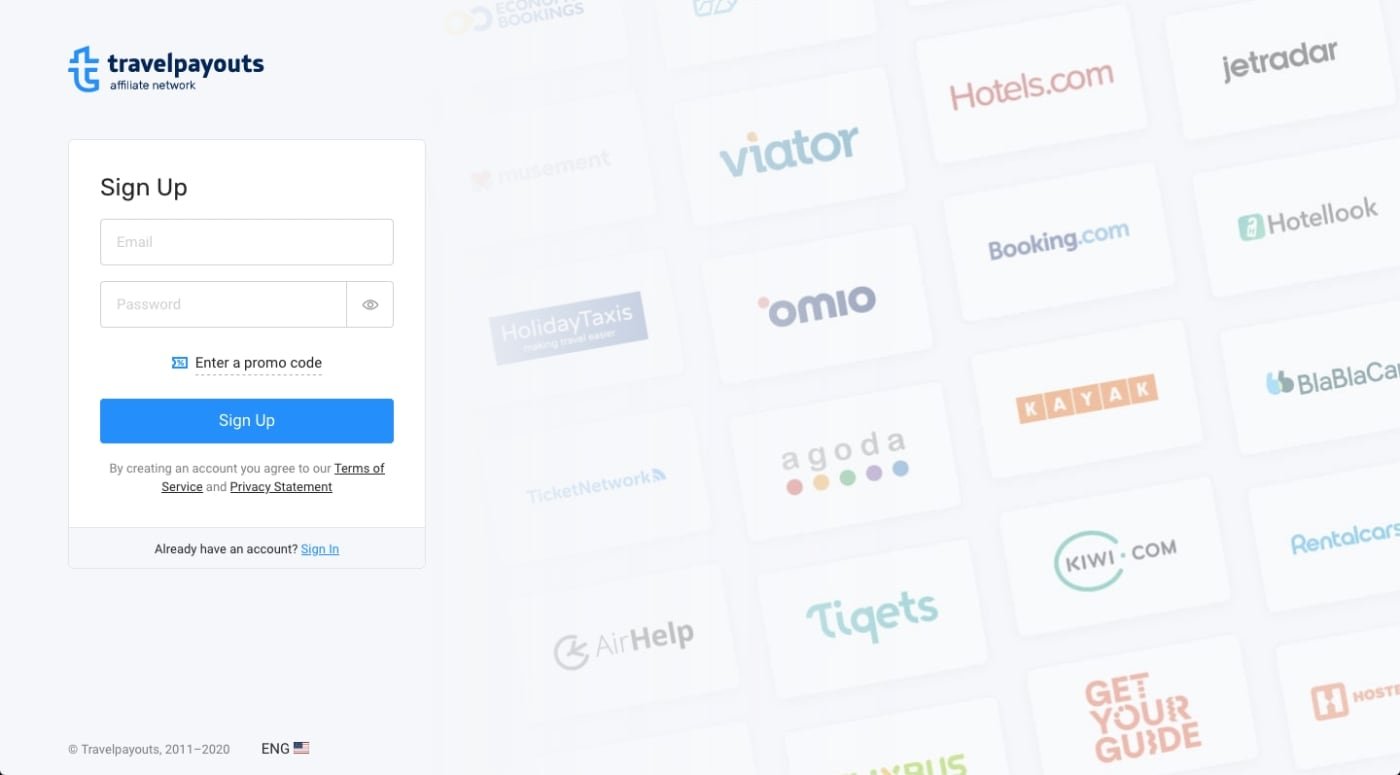
The first step in order to launch your white label search engine is to join TravelPayouts affiliate program. It’s free to join and there are no approvals required.
Head over to TravelPayouts and click Sign Up for Free. Enter your email address, choose a password, and click Sign Up.
Now check your email where you should find two messages. One that will ask you to activate your account and another one welcoming you to the platform.
Activate your account by clicking the link found in Account Activation email. After this, you’re ready to use all tools available on the TravelPayouts platform.
Step 2: Setting Up White Label
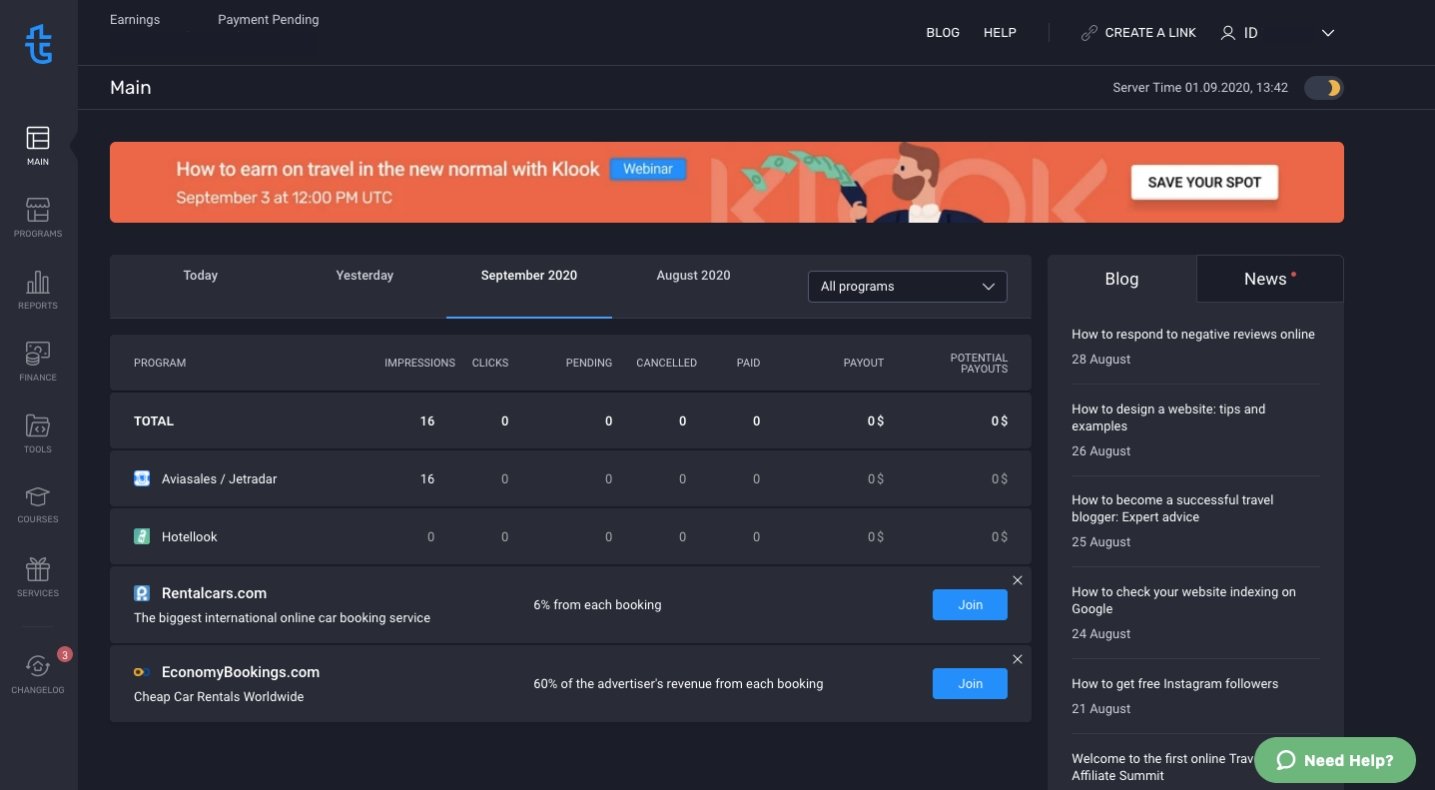
Once your account is activated, go to your TravelPayouts dashboard and click Programs. Under Tools, select White Label and click Search. You should see the Aviasales/Jetradar and Hotellook programs. Join these programs if they are not already joined.
Now click Tools under Jetradar, click White Labels and click Create a New White Label.
In the Main tab, enter the domain/subdomain you would like to make your flight search engine at. It can be yourdomain.com or subdomain.yourdomain.com. Because I want my search engine as a part of my blog, I choose flights.parvezish.com.
Then select whether you want this search engine to be limited to flights or hotels or you would like visitors to be able to search both. If you would have a separate one for flights and hotels, you should select Flights here and make a new white label for hotels later.
Next, select the default currency and language. Both can be changed by visitors if they need to.
If you want to serve your search engine over HTTPS, check the ‘Enable automatic HTTPS redirect’ box. Note that HTTPS redirect is not immediately available so be patience with that.
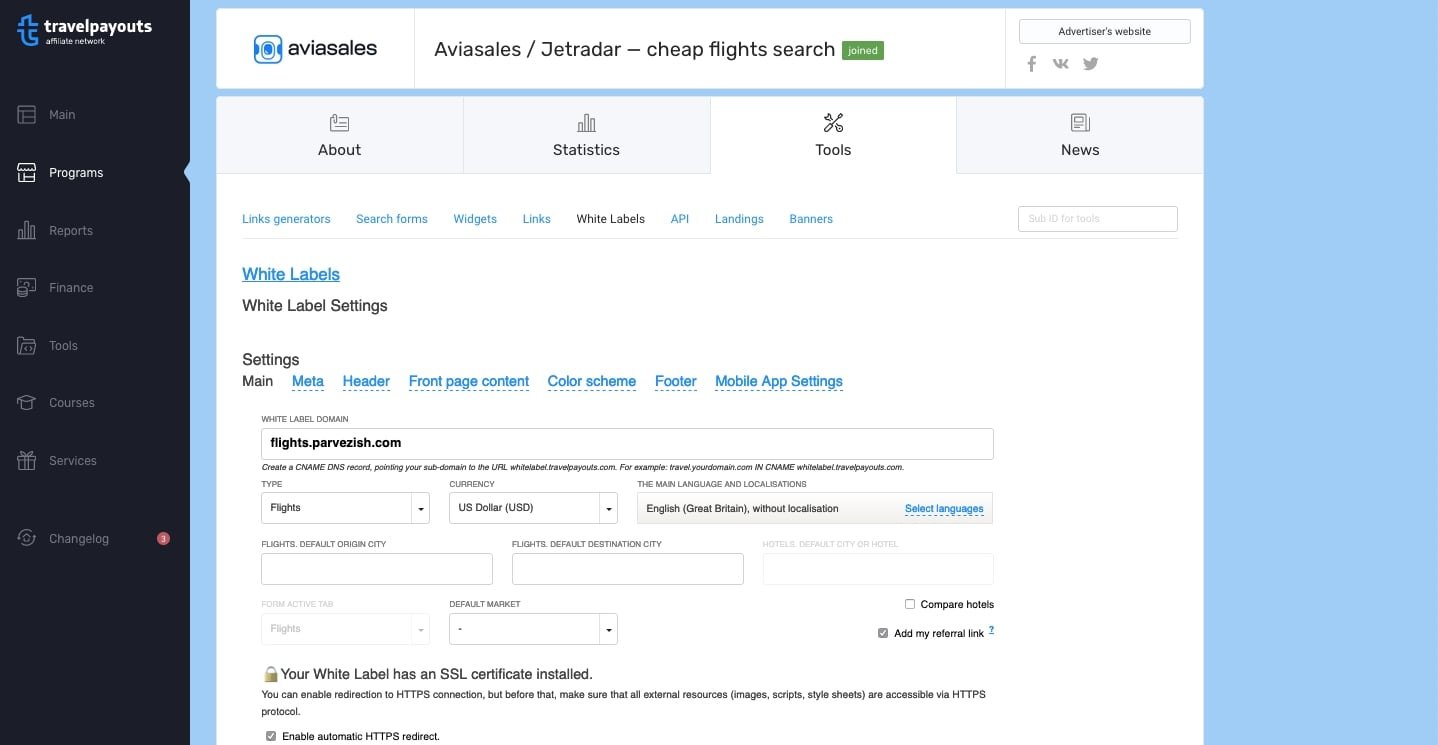
Once you change these basic settings, click Save to create your flight search. In the next step, you will create a CNAME entry after which your flight search engine will be ready.
Step 3: Create a CNAME Entry
Login to your domain registrar, web host or DNS provider’s dashboard and go to DNS records. If you don’t know how this is done then contact the host or DNS provider for help. I use Namecheap as my domain registrar which also serves as my DNS provider. So I login to Namecheap and find Advanced DNS section to ad a CNAME record.
Once in the DNS editor, create a new CNAME record with following details.
- Name/Host: Your choice of subdomain. This is the same subdomain you entered in Step 2 above. I will enter flights here. Depending on your service provider (or if you use cPanel), you may have to enter the full subdomain like subdomain.yourblog.com.
- TTL: Leave default.
- Target/CNAME: whitelabel.travelpayouts.com (depending on the service provider, you may have to put a dot at the end of the CNAME).
Click Add Record.
Once your record is added successfully, you are ready to browse to your white label flight search. In your browser’s address bar, type the address of your flight search. I will type flights.parvezish.com.
Note: It might take some time before your DNS changes take effect. Wait for a few minutes if you are not able to browse to your flight search immediately.
Step 4: Additional Steps
Now that you have successfully setup a white label flight search, you are ready to explore more customisations.
Go to White Label on your TravelPayouts dashboard again and change a few settings like Meta, Header, Front page content etc. I will explain these sections in short. Familiarise yourself with these settings, use the Preview button to test before you finalise, and set them according to your requirements. Remember to save your white label setup for changes to take effect.
Meta Tab
Click Meta tab and change the text between title tags. This text will be shown on the title bar of user’s browser. You can choose something like “Search Cheap Flights” or other meaningful text. Do the same for other page types, too.

Note: Do not remove any tag or other code. Edit only the text string.
Colour Scheme
Now it’s time for you to choose how your flight search engine will look. So head over to the Colour Scheme tab.
Here you can choose one of many pre-defined colour schemes or click Custom scheme and choose your own colours for different elements.
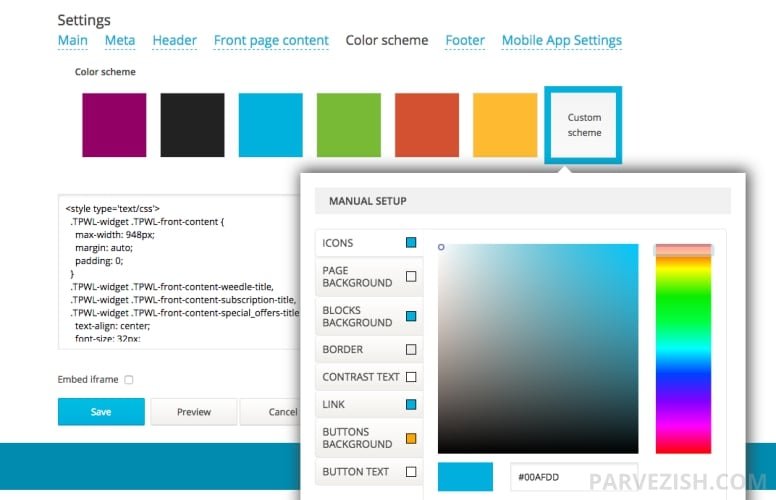
Choose colours as you desire. Use the preview button to see how the results look. Ideally, this colour scheme should match with your blog’s colour scheme to give the similar-looking experience to your visitors.
Front Page Content
By default, the homepage of your flight search will display a search form. Underneath this form, there are some popular destinations and deals. You can change what is displayed on your homepage by changing settings under Front page content tab.
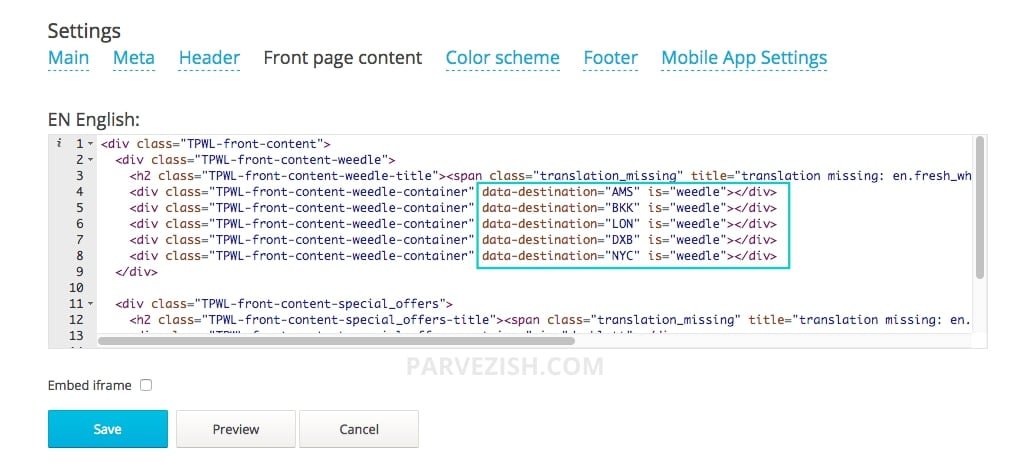
To change popular destinations, you will have to find airport codes of cities that you want to display on your homepage. On my flight search, I have added cites like Amsterdam, Bangkok, Dubai etc.
To find airport codes, you can visit this page. For example, airport codes for Dubai, Bangkok, and Amsterdam are DXB, BKK, and AMS, respectively.
Once you have airport codes of all cities you want to display under Popular Destinations, go to Frontpage content tab and add them in “data-destination.” See the following screenshot for better understanding.
Once you are done with these settings, save the white label and see the final results.
What Next?
Now that you have created your own white label flight search, you are ready to direct your blog’s audience to it. But before that, I advise you to perform thorough tests to make sure things work as intended.
Once you are satisfied with everything, you can put links or banners on your blog advertising your new search engine. You can also publish a blog post or send a newsletter announcing the launch.
Keep in mind that you will not see results immediately. The more your audience grows, the more traffic your flight search will receive. Remember that ‘brand’ plays a big role in people’s minds. If you have a good number of loyal audience, they will appreciate you launching this tool for them.
That’s not it. When you start planning your next trip, you can use your white label to book flights. This will help you earn commission on your own bookings.
Making A White Label Flight Search: Summary
Creating a white label flight search engine is fairly easy with TravelPayouts affiliate program. Using their white label tools, you can create a free flight and hotel search solution with your own logo and colour scheme. Your loyal visitors will search for flights as usual and every time a flight is booked, you will receive a commission.
In order to create your own flight search, you will need a working website, of course. In addition, you will need to join TravelPayouts affiliate program after which you will be able to choose your desired settings. If all goes well, you will have a working white label flight search platform under your own brand in less than 30 minutes.
That’s all, folks. This was a step by step guide showing how to create a white label flight search. I have written this guide keeping fellow travel bloggers in mind but any individual/organisation working in the travel industry can have their white label.
I hope you found this guide useful and I’d like to thank you for reading. Have question? Feel free to ask. Can this tutorial be improved? Let me know.